Interface overview
A quick overview on Briefer’s interface and how to use it.
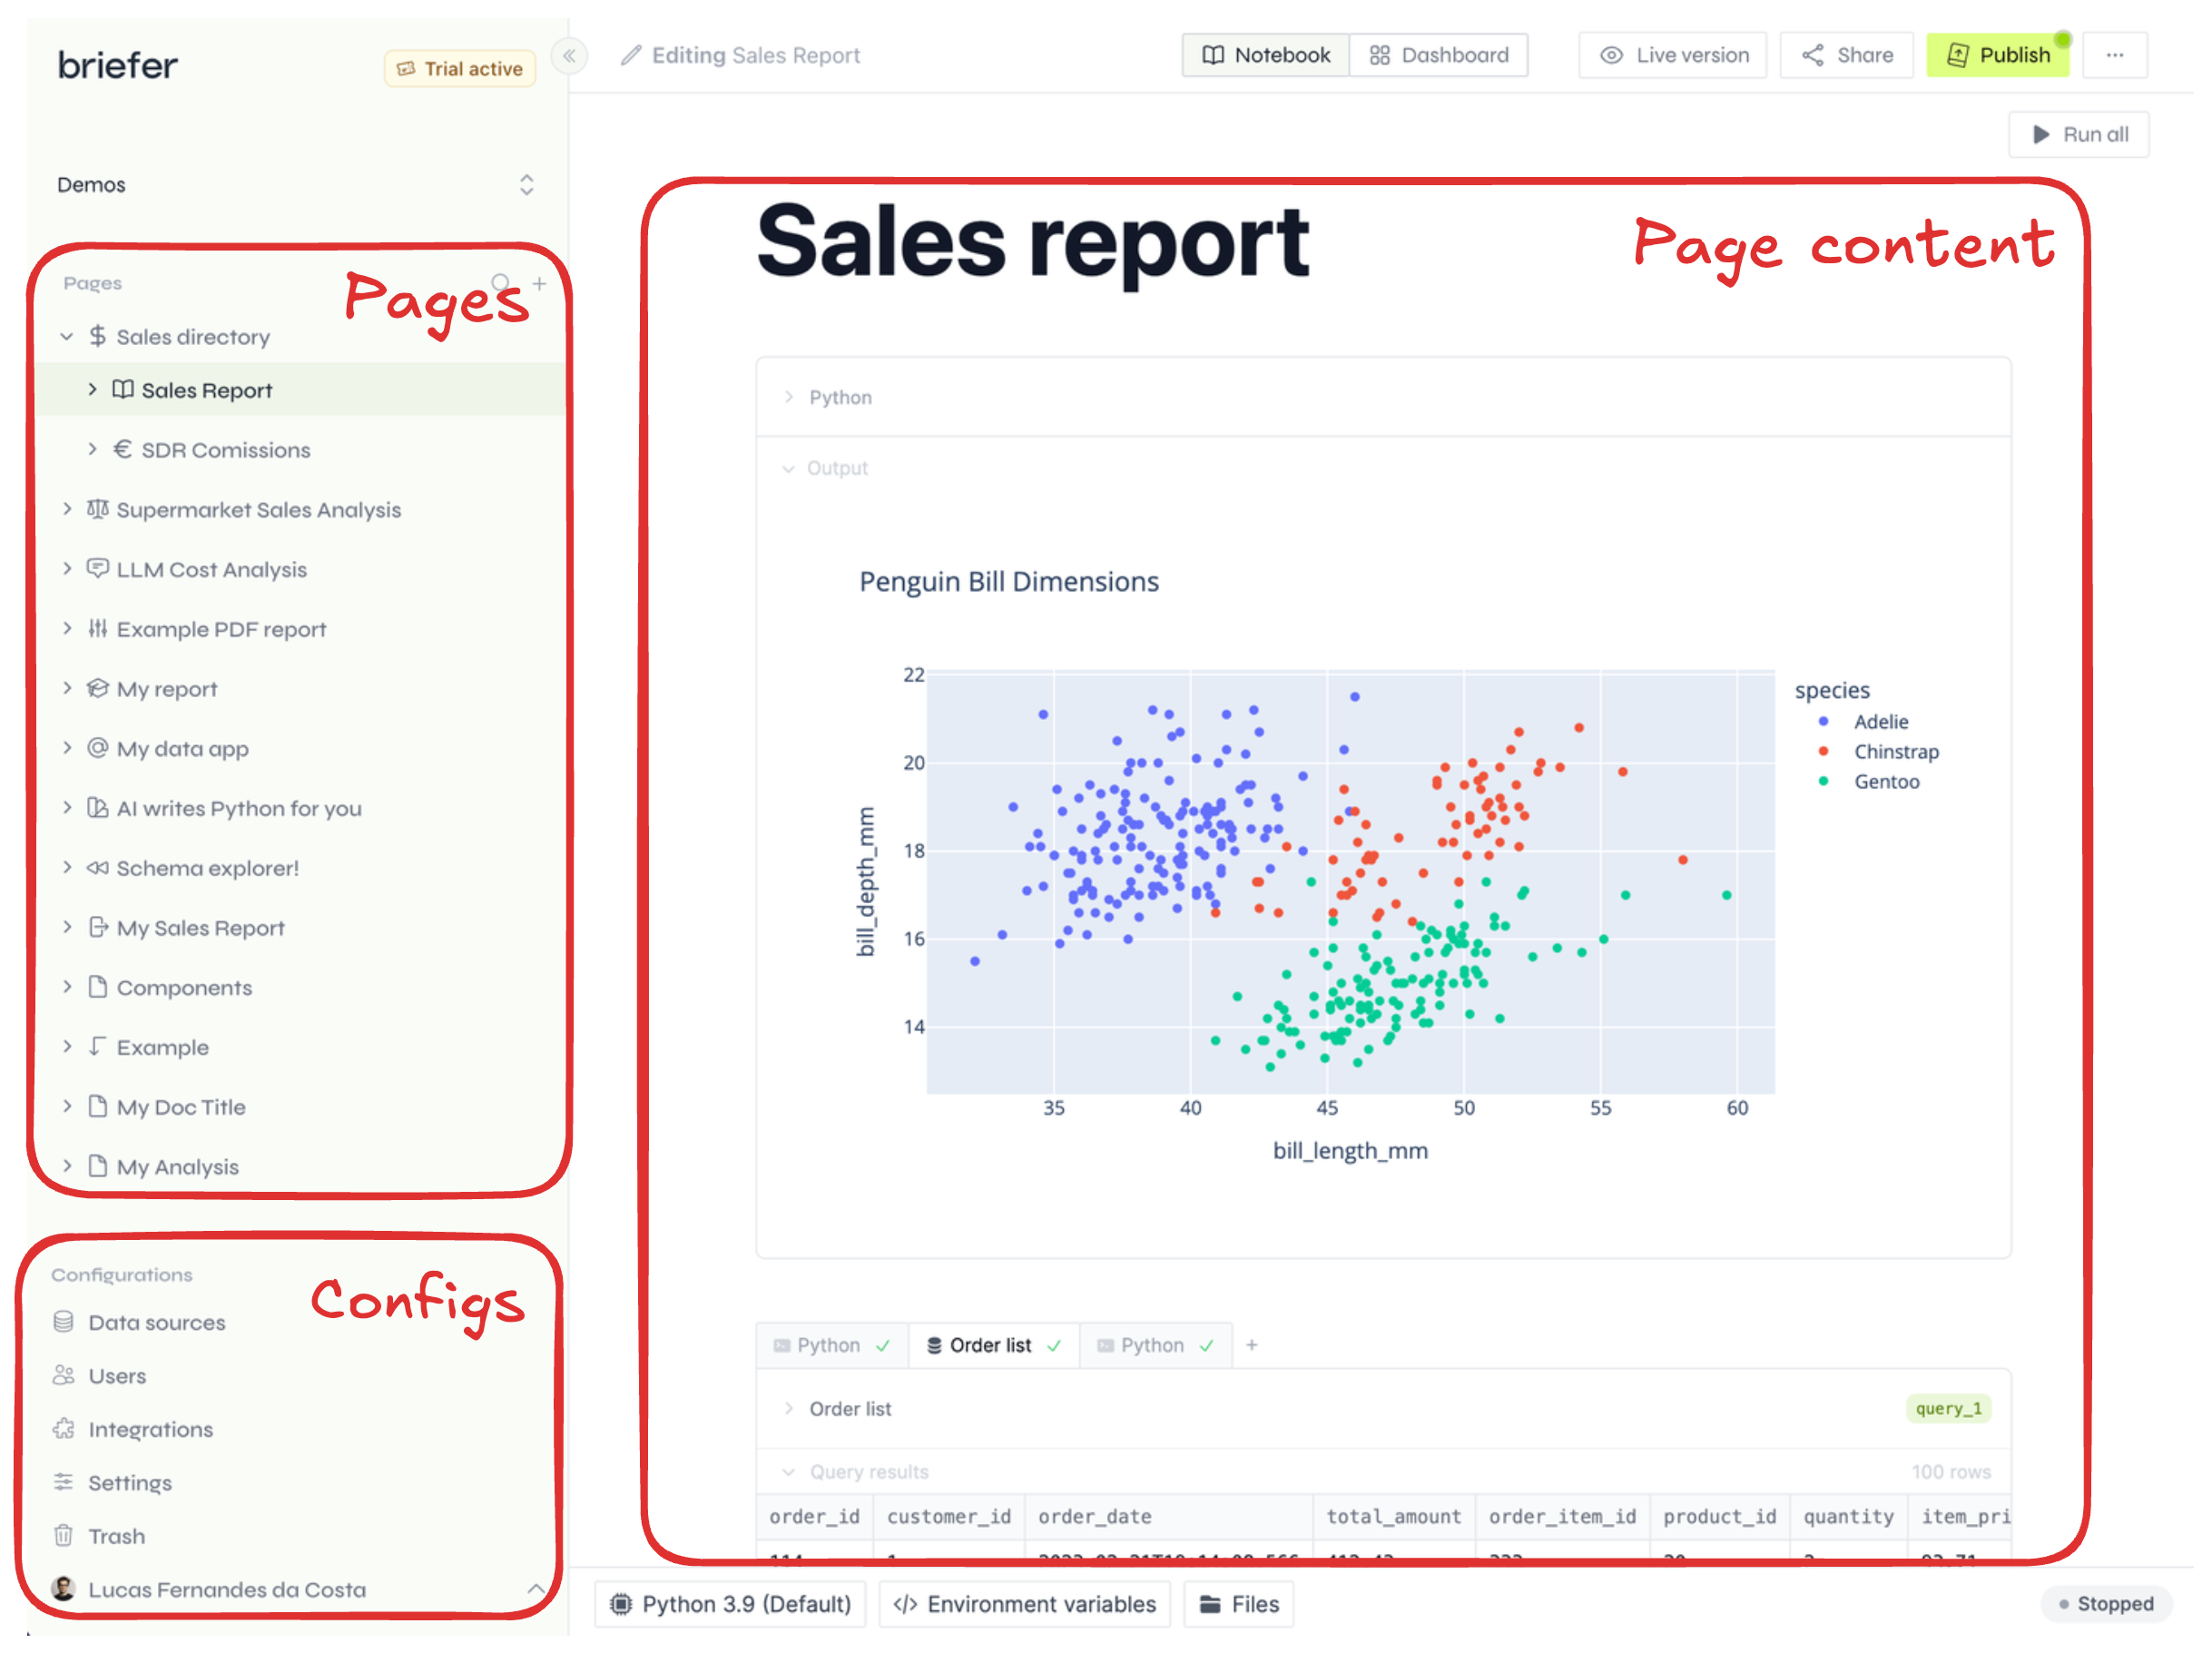
When you log into Briefer, you’ll see a list of pages on the left, and your document’s contents on the right. As you navigate through the documents on the left, you’ll see the content on the right change.
Additionally, on the bottom left corner, you’ll see menu options to add data source connections, configure your workspace, invite collaborators, and more.
Briefer's main interface
Briefer’s editor
Briefer’s editor is where you’ll edit your pages, write code, and create visualizations.
Every page is made of blocks. You can add a new block by clicking the plus icon that appears when you hover over the gaps between blocks.
The "add block" button and the list of available blocks
There are multiple types of blocks you can add, such as:
- Text blocks (with Markdown support)
- Query blocks: for SQL queries
- Python blocks: for running Python code
- Visualizations: for point-and-click visualizations
- Writebacks: for writing data back to your database
- Inputs: for adding text inputs, dropdowns, and date pickers to your pages
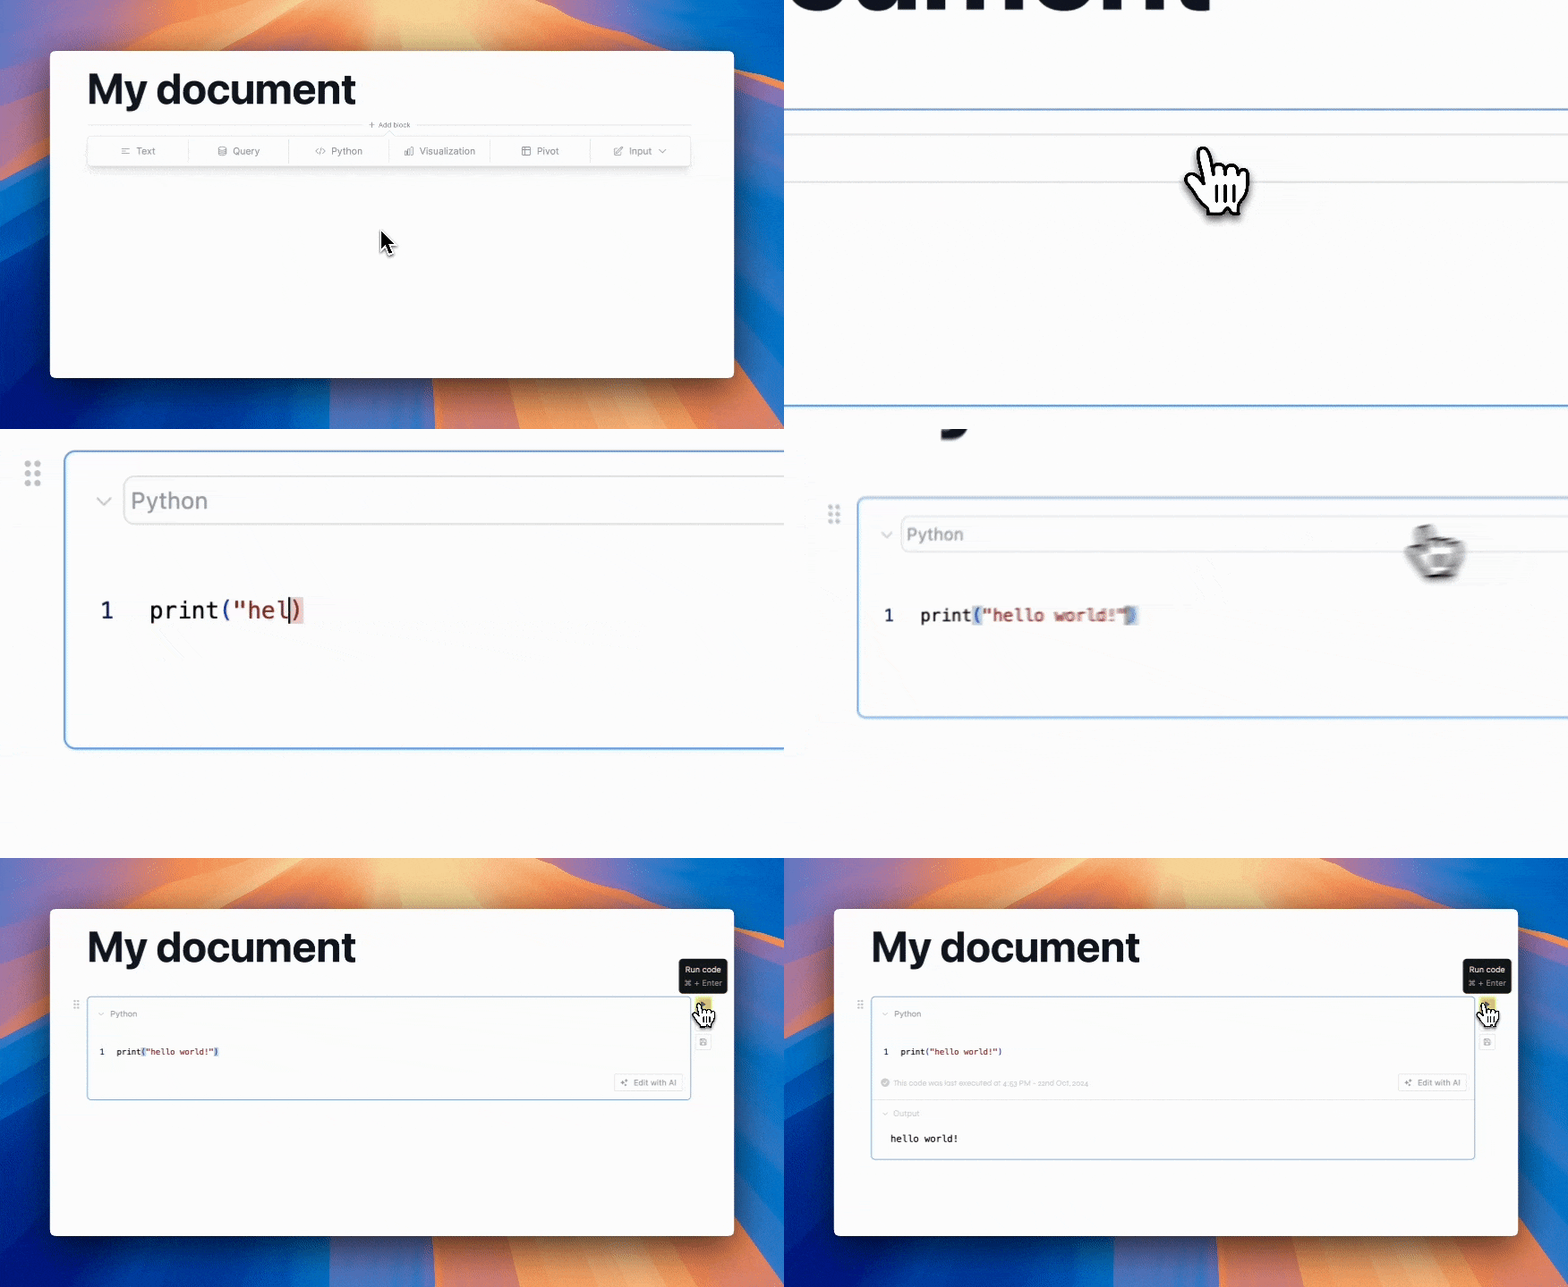
After adding a block, you’ll see a block-specific editor where you can write your content, queries, or code.
Adding a Python block and running a piece of code
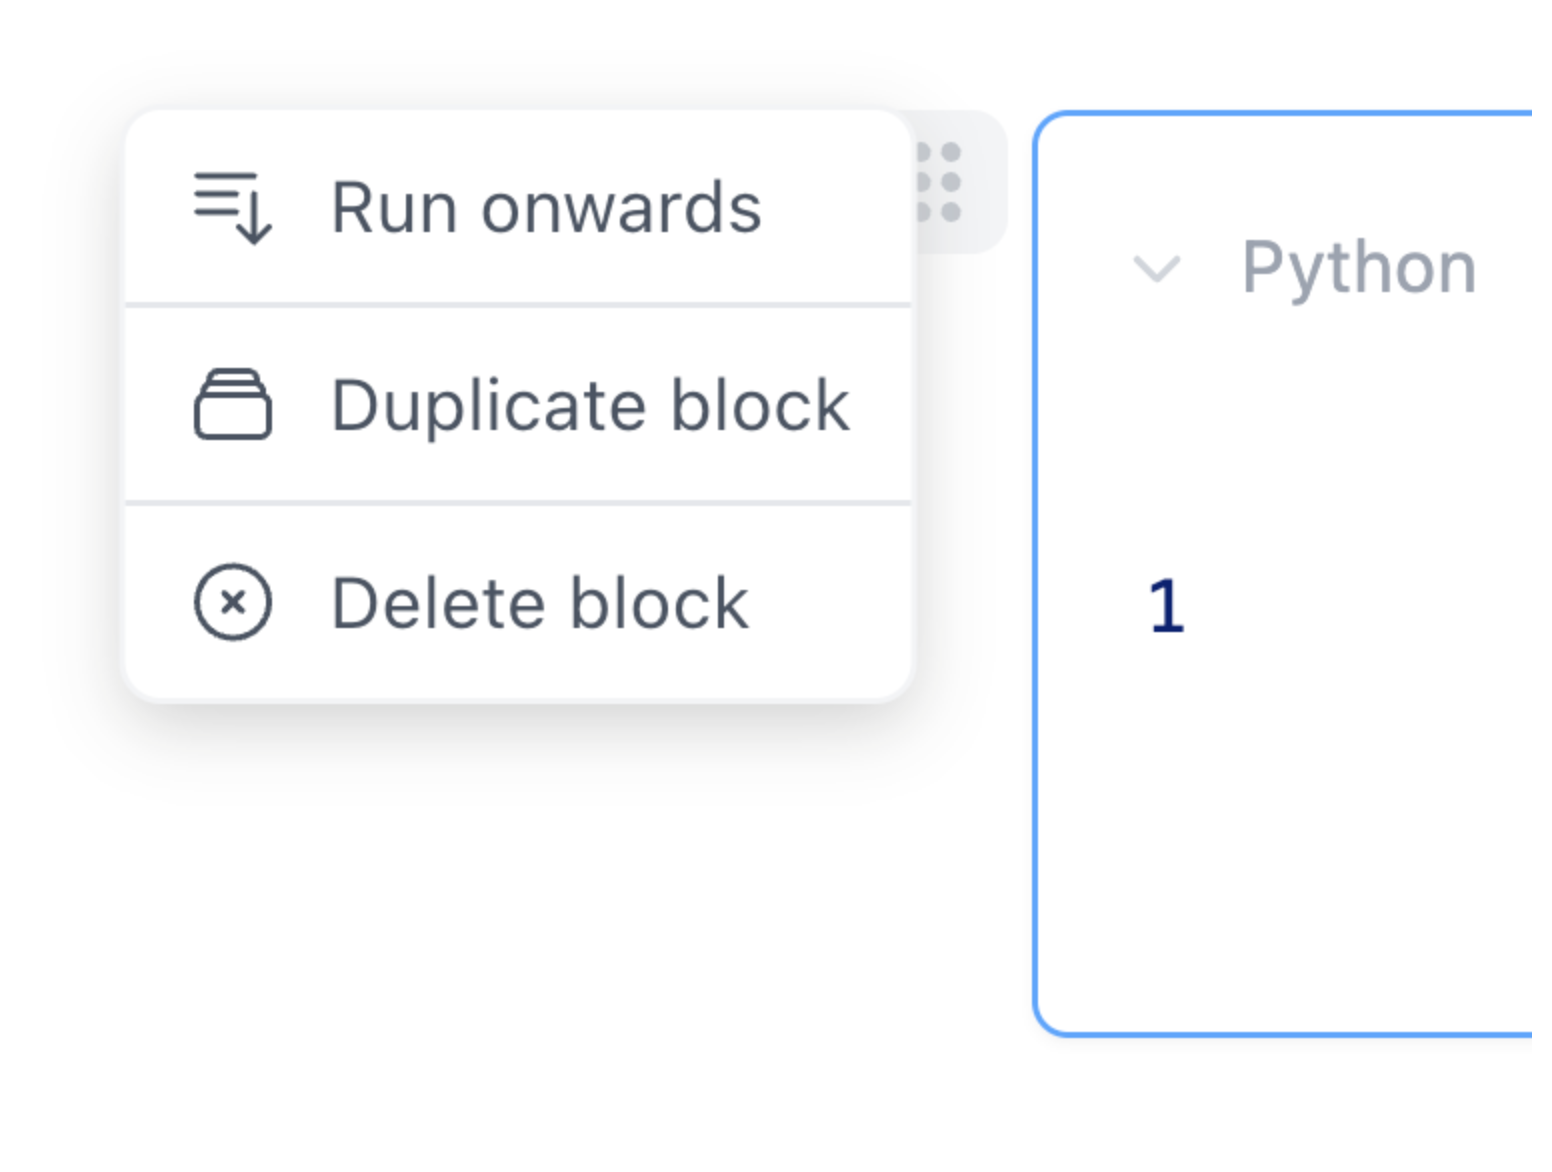
All blocks display a “drag handle” on the top left corner once you hover over them. You can use this handle to move the block around or you can click it to view a menu in which you can duplicate, delete, or hide the block.
The drag handle and the block menu
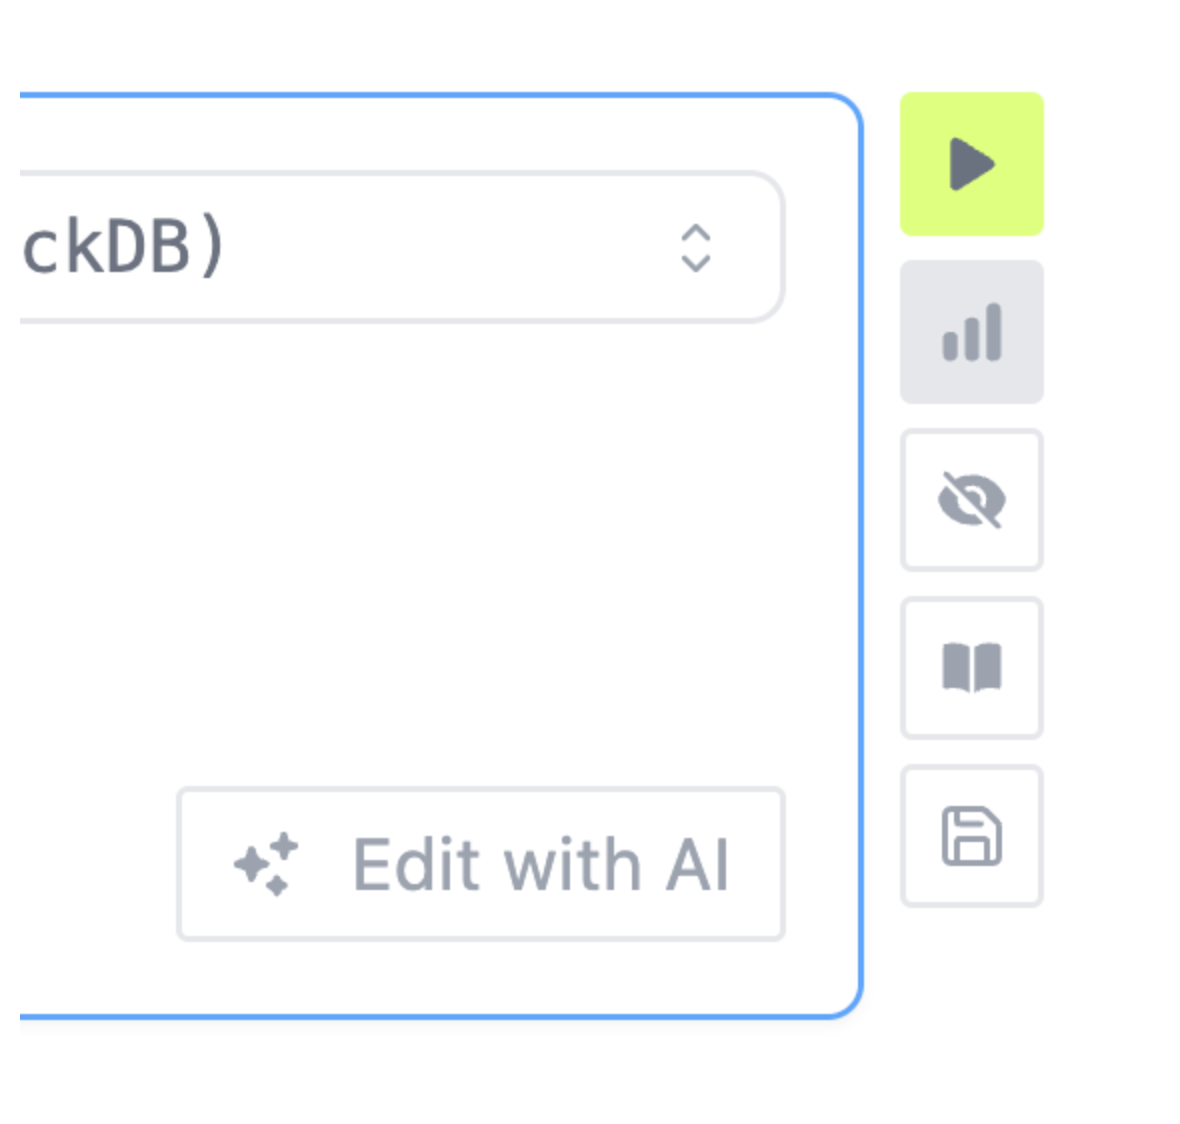
Additionally, most blocks also display action buttons on the top right corner. These buttons depend on the block type and allow you to perform actions such as running a query or a piece of code, refreshing a visualization, or exploring your data source’s schema.
The action buttons on the top right corner of a block
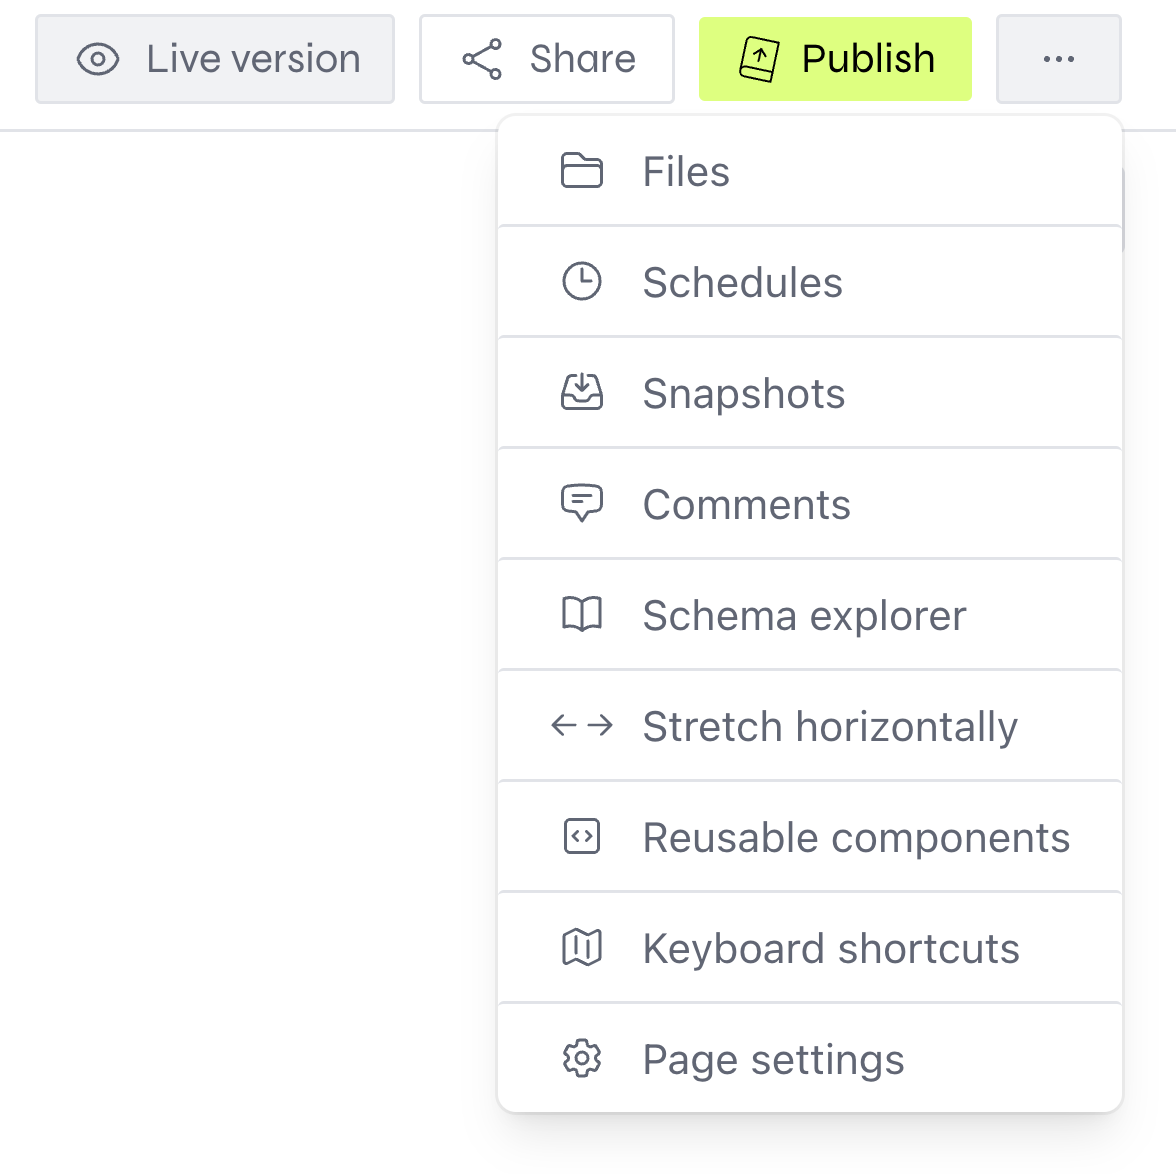
Finally, on the top right corner of the editor, you’ll see button with three dots within. Clicking this button will open a menu showing additional features, like managing files, scheduling the page to run periodically, or opening the schema explorer.
The three dots menu on the top right corner of the editor
Notebooks and Dashboards
You can switch between notebooks and dashboards by clicking the “Notebook” or “Dashboard” button on the top right corner of the editor.
After switching to a dashboard, you’ll see a grid into which you can drag and drop blocks from the left sidebar. This allows you to create a layout for your dashboard.
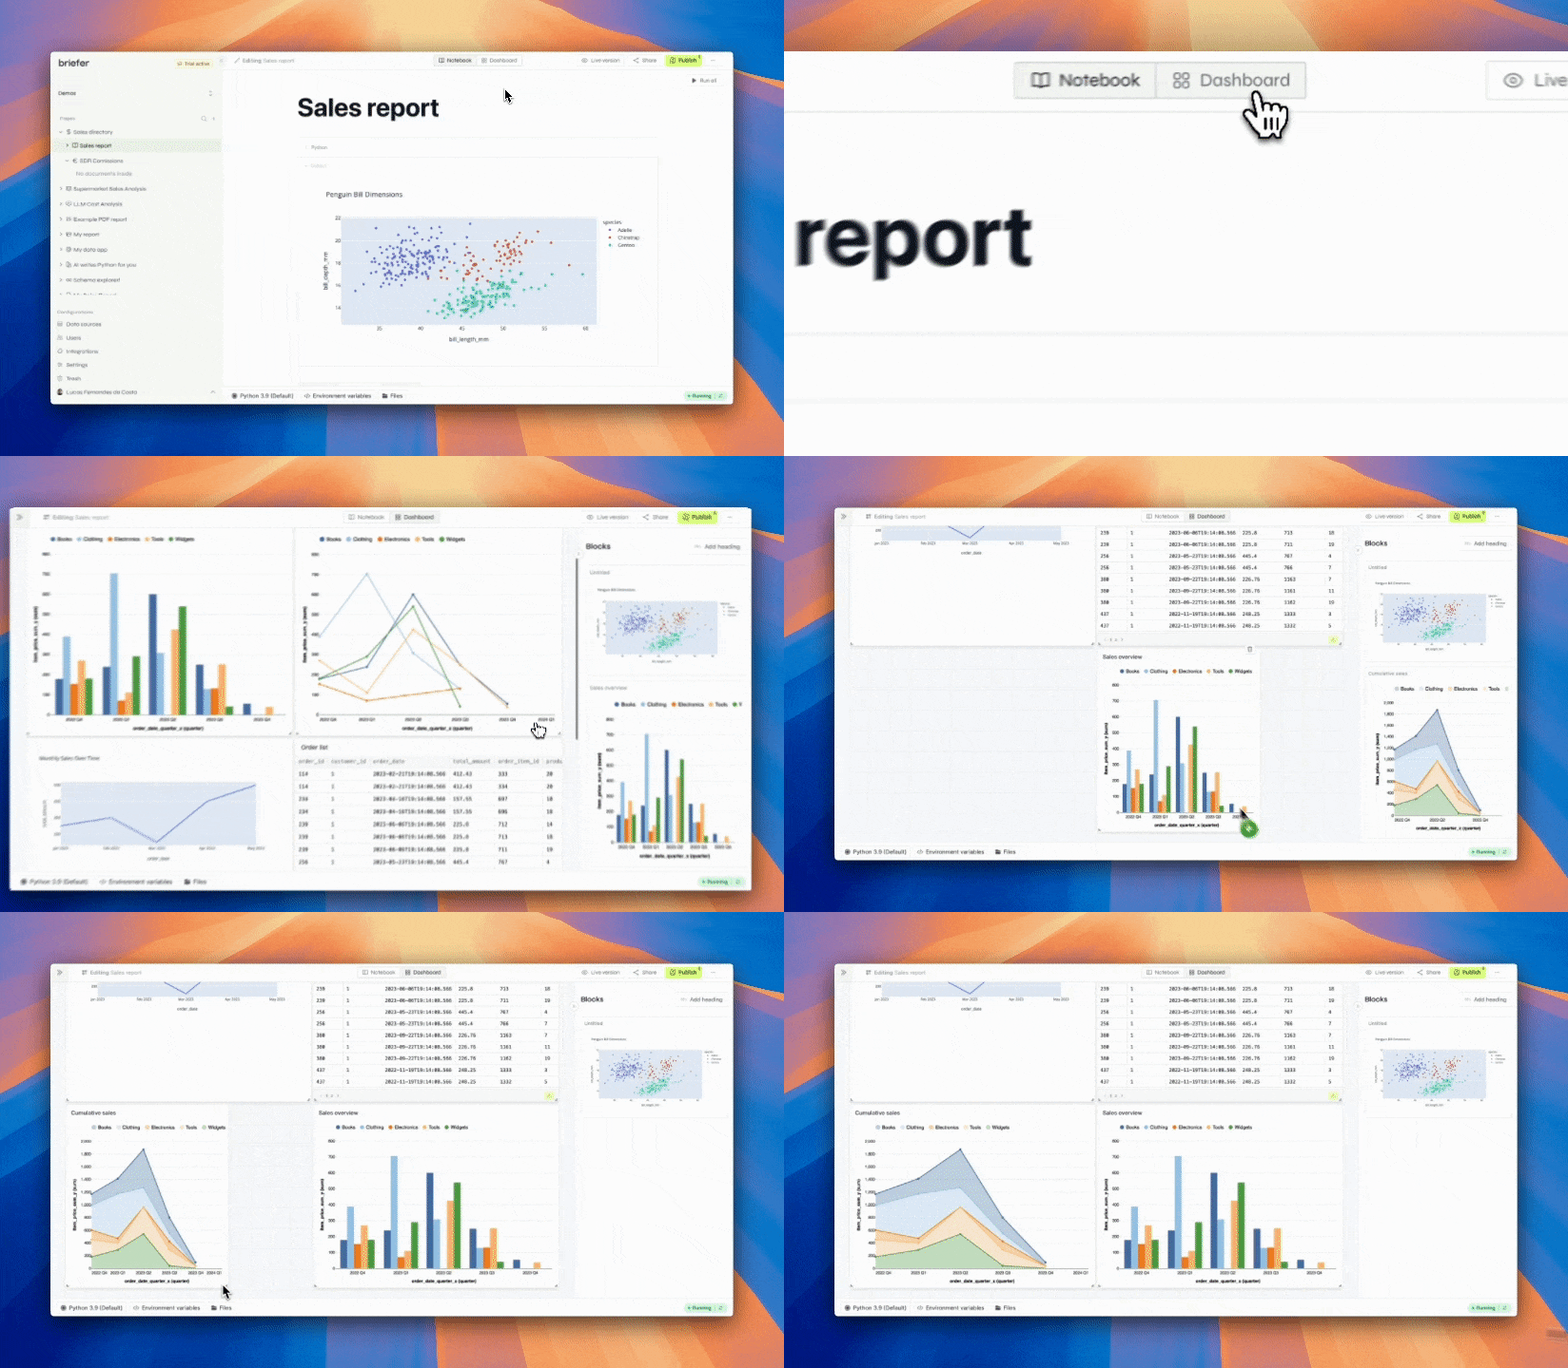
Creating a dashboard by dragging and dropping blocks
Publishing and editing
Once you’re done editing a page, you can publish it by clicking the “Publish” button on the top right corner of the editor.
In a way, publishing a page is similar to “git commit” in that it saves the current state of the page as the latest version.
To edit a page that has already been published, click the “Edit” button on the top right corner of the editor. This will take you to the the editor where you can make changes.
Organizing documents and finding them
The file tree on the left allows you to nest documents into one another. This is useful for organizing your work into different sections or categories, as folders in a file system.
Briefer's file tree showing nested documents
To nest a document into another, simply drag and drop it into the folder you want it to be in. Alternatively, you can click the plus icon next to desired document to create a child document.
Expand and collapse folders by clicking on the arrow next to the folder name.
You can also drag and drop documents to move them around.
Cmd+K
on Mac or Ctrl+K
on Windows).Your environment and environment variables
When editing a notebook, the bar at the bottom of the editor shows the environment you’re currently using. You can click the environment name to view the environment’s details, like its Python version, installed packages, and resource limits.
The bottom bar also includes buttons for adding environment variables, which are useful for storing sensitive information like API keys or database passwords.
Finally, you can use the “files” button to manage files that are available to your notebooks.
The bottom bar in the editor